|
||||||||||||||||||
|
Snubber Circuit
The first thing to do is to solder a snubber circuit across the 400-300-0-300-400 wiring. This joins together both of the 400v taps via a capacitor in series with a resistor.to begin with, the one leg of the resistor and the capacitor are twisted together and soldered to provide a firm connection.
Doing this first should make the following wiring easier to achieve.
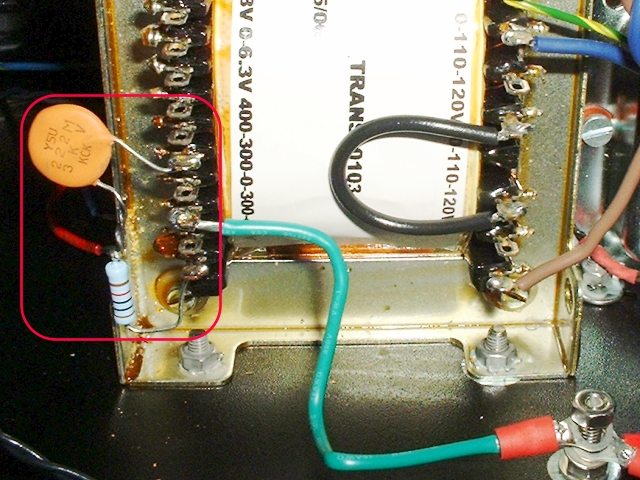
I also took the opportunity to hook up the centre earth to chassis ground. This would help later when finishing off the wiring loom.
Please note that the above picture is taken from the DAC 2.1 build but the video is from the Ki1 Phono Stage Build.
Planning the wiring
Please note that this diagram is different to that in for the phono build in-that the M2 board is rotated 90 degrees anti-clockwise here. This is because the 'digital' power supply board forces the board to be moved toward the front of the chassis.Looming the wires for the secondary to M2 board required a little planning so I drew a diagram for the purpose - and here it is:
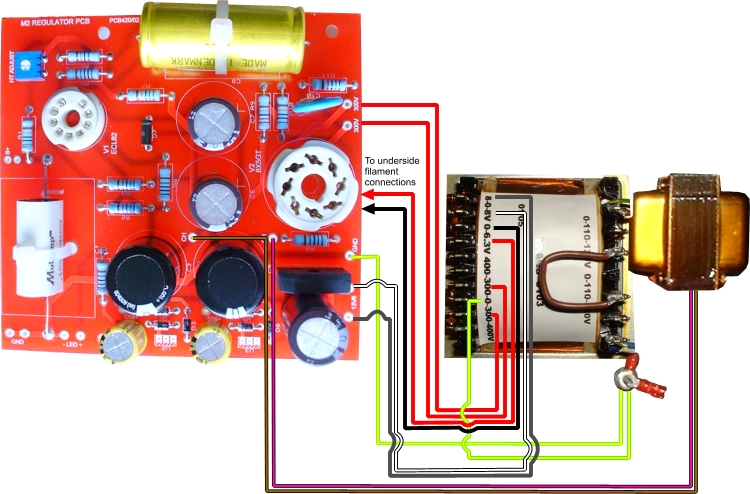
| Wire(s) | Description |
|
|
There are 2 earth wires: 1. GND on PSU board to Earth Tag. 2. 0v on 400-300-0-300-400 taps to Earth Tag. |
|
|
These two wires go from terminals marked 13v6 on the PSU board to the 8 and 8 taps of the 8-0-8 winding. Note the 0v tap of this winding is not used. |
|
|
These two wires go from the terminals marked 300 and 300 on the PSU board to the 300v taps of the 400-300-0-300-400 winding. |
|
|
These two wires connect the filament wires of the valves. Black connects pin 2 of the 6X5 to 0v of the 0-6.3 winding and Blue connects pin 7 of the 6X5 to 6.3 of the same winding. These will be attached to one of the valve bases on the underside of the board. |
|
|
These two wires are from the choke and connect to the two terminals marked CH on the PSU board. |
I also included the choke leads and remaining ground leads (i.e. the ones requiring chassis earth - but excluding any from the 'digital' power supply at this time).
Inter-wiring
I began by soldering the necessary wires (for this stage) to the M2 power supply board and then secured the board in place.
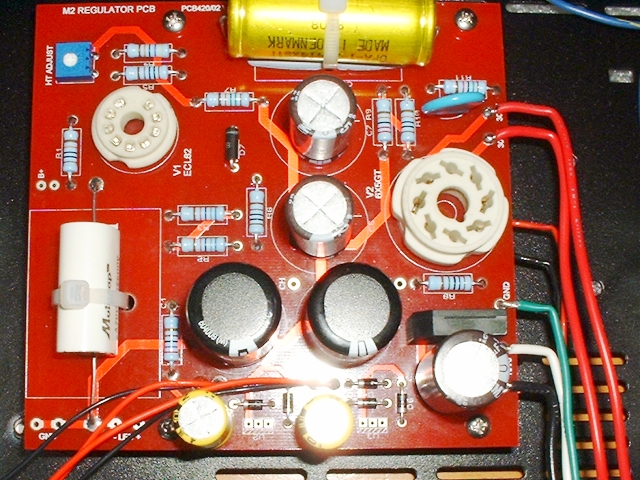
I began the loom from the wires at the top-right of the board (as seen from the previous picture) and worked downward. I also included the choke wire that, unlike the diagram, I passed behind the mains transformer. Actually I passed its wires through the holes in the mains transformer's frame.
When I got the edge of the chassis, I changed direction going toward the mains transformer. When I reached the mains transformer, I changed direction once again twoward it and then up its outside. The earth wire that I installed earlier helped with the change of direction.
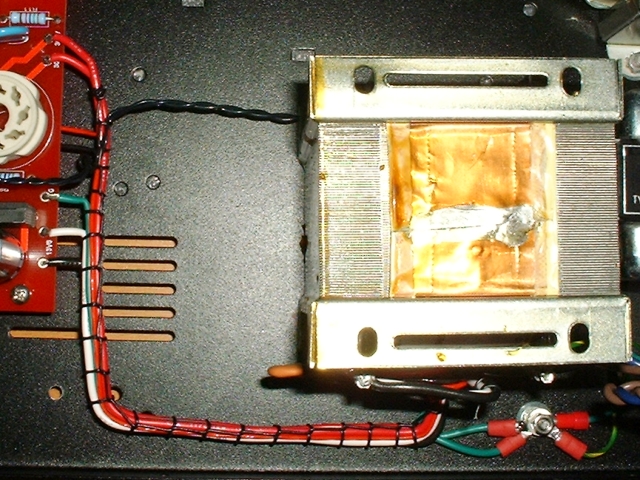
View from the top of the loom. You can see the choke wire coming from the back of the mains transformer
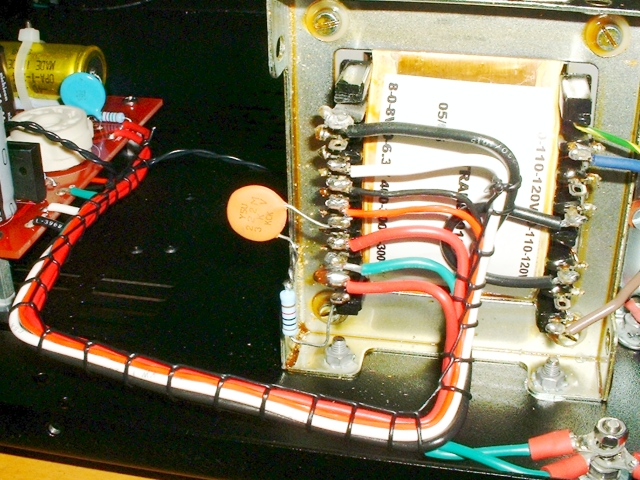
View of the transformer's secondary connections
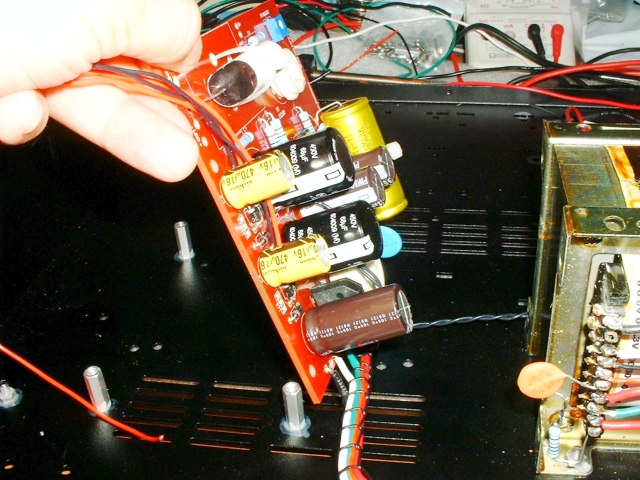
The loom acts as a natural hinge so I can still get to the back of the board at this stage. That is how I finally soldered the choke wires to the board.
Finishing Off the Board
The final step before testing can take place is to install the two outboard regulators. These solid state regulators are used to regulate the two heater supplies used by the analog board's valves.These regulators sit on a heatsink that is bolted to the chassis. They must be insulated from the heatsink.
The following video is taken from the Kit1 Phono Stage build and shows how to attach the regulators to the heatsink.
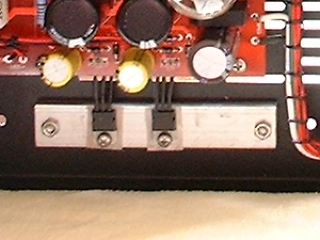
At this point the board can be tested. It is important that before powering up you check to make sure that there are no bare wires that may short to anything.
Once powered up, you should be checking that the HT supply (variable around 230v DC) is OK and that the two heater supply voltages are fine (6.2v DC).
|
|
